
Empower your golf game
with real time visual training!
A golf training aid like never before...

Steady Swing transforms your eyewear into a visual training system:
- Your eyewear is easily transformed by attaching the red Steady Swing lenses onto the inner surface of your eyewear lenses. The lenses can be attached vertically or horizontally for two distinct training modes.
- Viewing through the transparent red lenses projects a red "training window" on the ground at address.
- Excessive head and posture movement will be instantly revealed by seeing the window move!
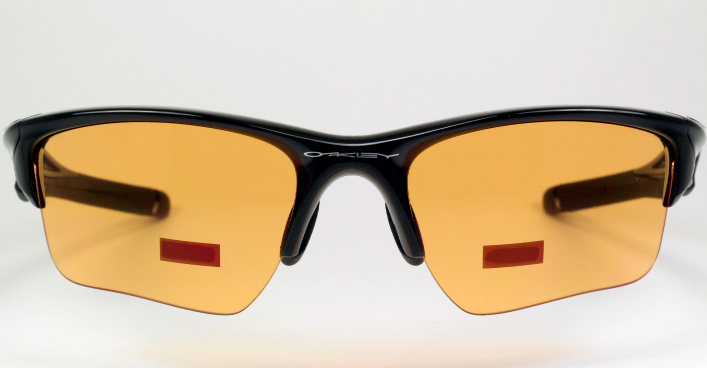
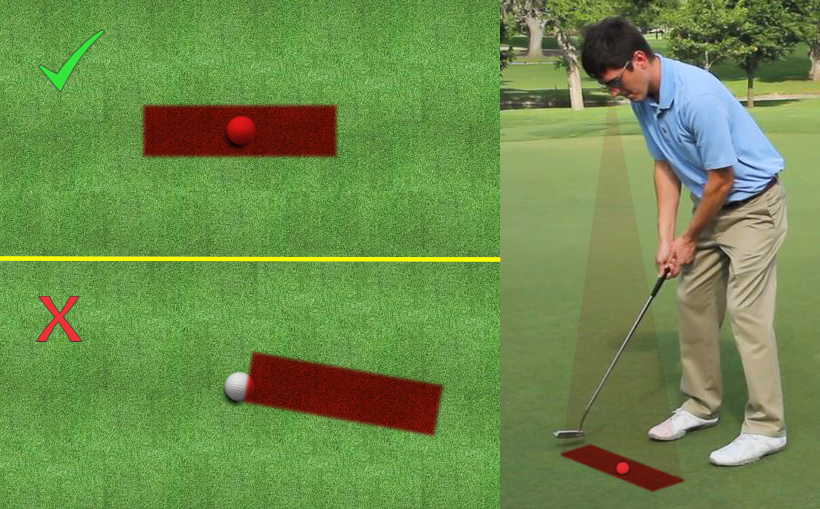
Horizontally aligned
Steady Swing lenses on sunglasses
Step 1: Attach the lenses onto your eyewear.
Steady Swing provides a lens booklet containing 8 reusable lenses and a pair of non-scratch tweezers.
- Using the tweezers remove a lens from your lens booklet and attach it onto the inside surface of your left eyewear lens:
- Position it in the lower region of your left eyewear lens either vertically or horizontally aligned as shown.
- Simply press the lens onto your eyewear lens. The cling backing will hold it securely in place.
- Use the same method to attach a lens onto the inside surface of your right eyewear lens.
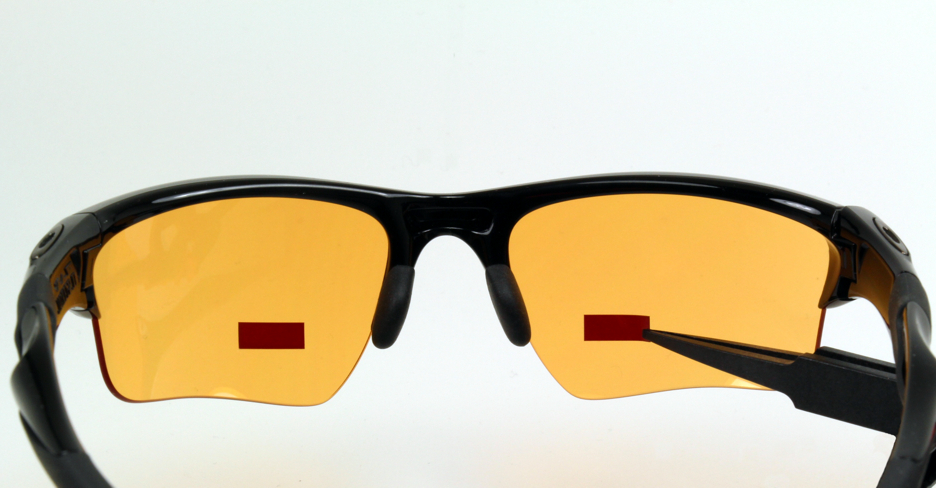
Initial attachment of the lenses onto your eyewear
Step 2: Position the lenses for the desired visual effect.
The lenses must be positioned correctly to produce a clear and focused training window at address. This is accomplished by adjusting the left and right lenses so that the images they each project on the ground directly overlap and merge into a single training window image.
The training manual provides a step by step lens positioning procedure.
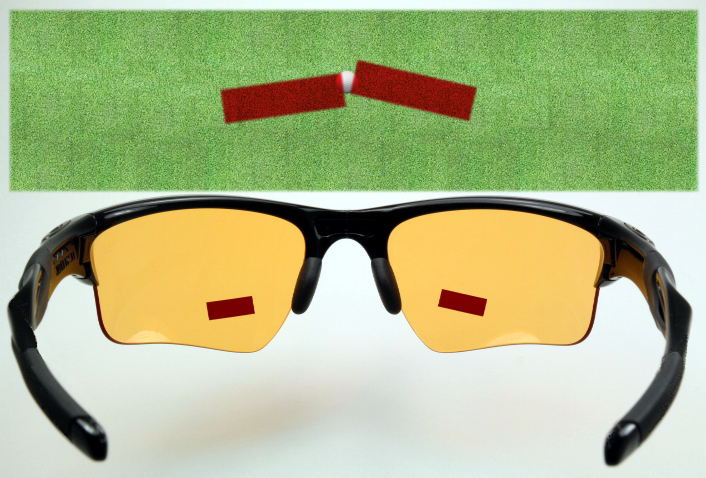
Incorrect lens placement
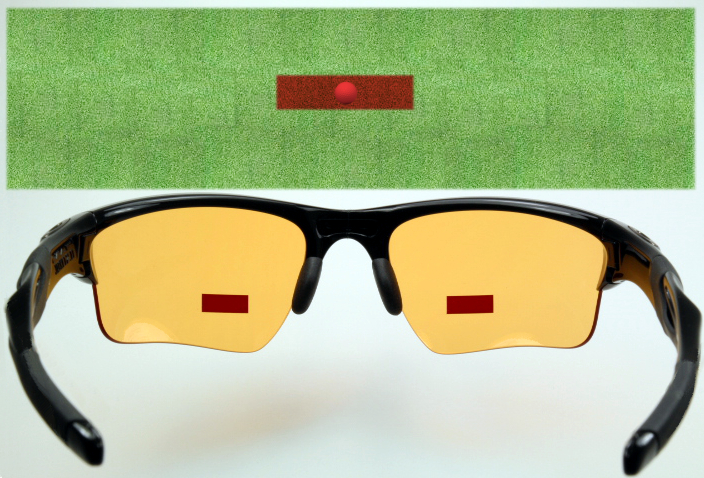
Correct visual effect at address
Step 3: Improve your golf game with Real-Time visual feedback.
Steady Swing is easy to use, simply strive to minimize the movement of the training window during your putting stroke and golf swing. The less the window moves, the more stable your golf game will become. For best results use Steady Swing in bright outdoor conditions.
- Address your golf ball ensuring proper posture and correct alignment along your target line.
- Viewing your golf ball confirm that the red window is correctly positioned and aligned relative to your club head and target line.
- Perform your putting stroke or golf swing while striving for minimal window movement.
- Excessive head and posture movement will be instantly revealed by seeing the window move!
- There should be absolutely zero window movement during your putting stroke. Keep the window perfectly still until the ball has reached the hole.
- A moderate amount of window movement is ok during the full swing. Focus on keeping the red window behind the ball during the downswing. DO NOT allow the red window to jump ahead of the golf ball prior to impact!
- Repeat these practice drills while striving for minimal window movement.
Training with Steady Swing will quickly and effortlessly enable you to develop a stable, repeatable golf swing and putting stroke based on the core fundamental of a steady swing center.
Strive for zero window
movement during your putting stroke
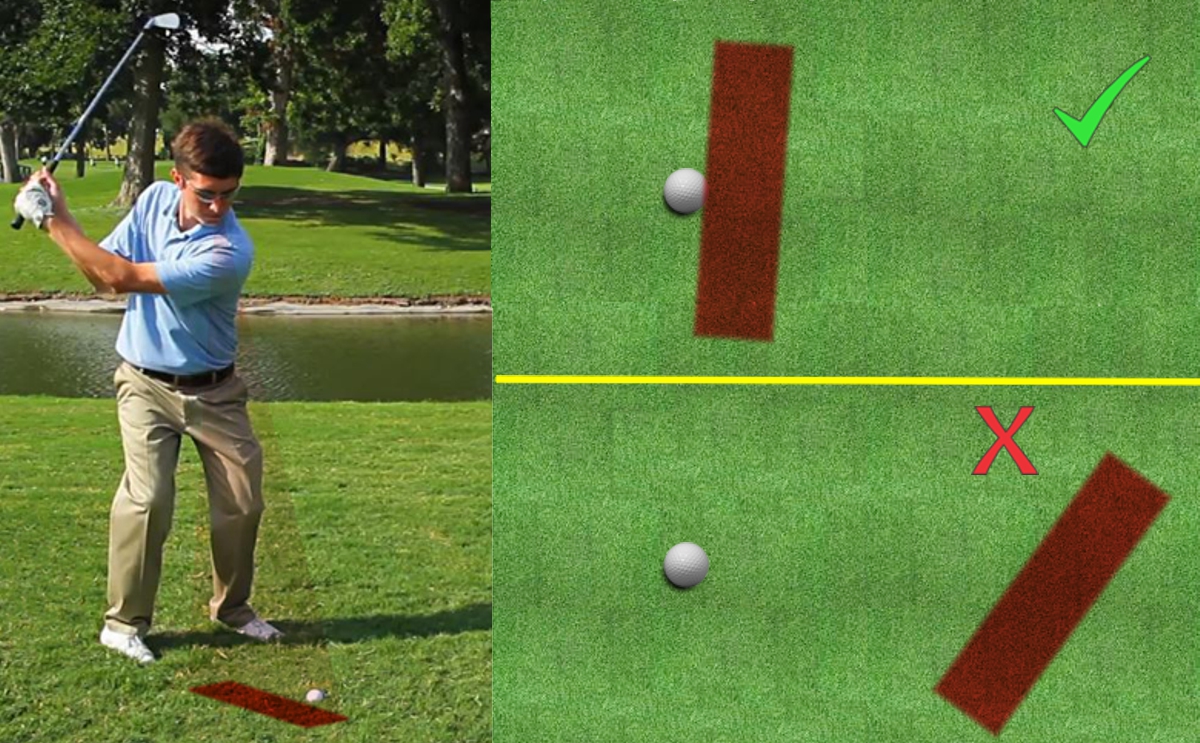
Strive for moderate window
movement during your full swing

Made In The USA
Copyright © 2013, Steady Swing. All rights reserved.
Patented design. A product of ES4U Ltd. Co. San Antonio Texas

